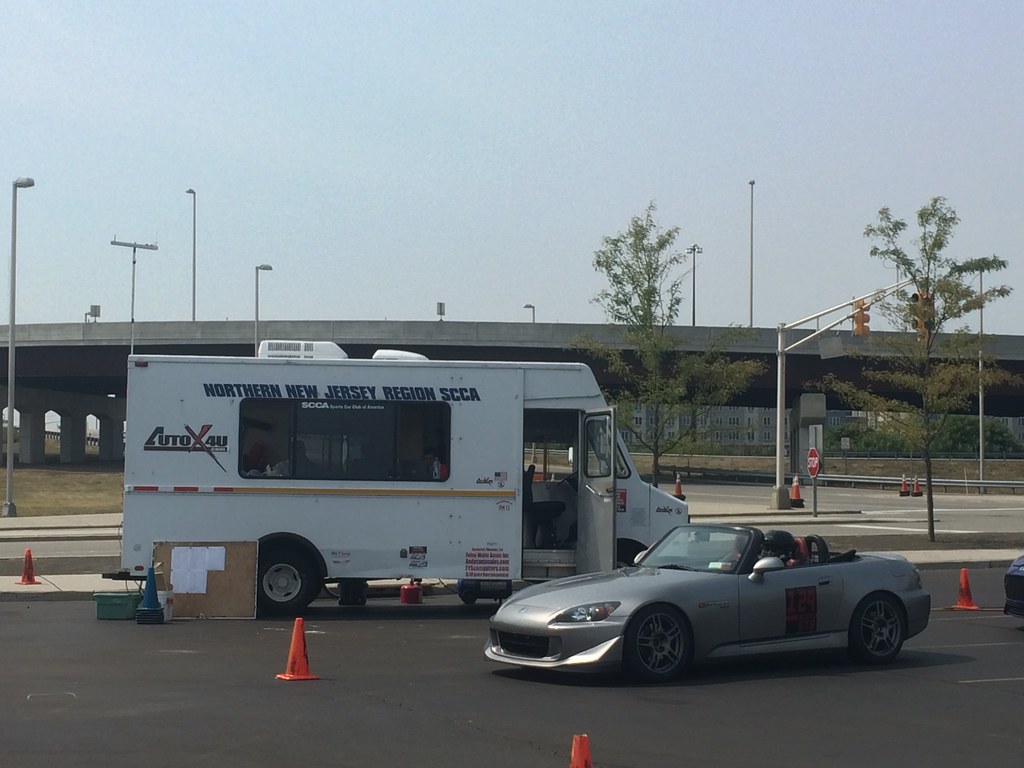
After yesterday's alignment it was time to get some testing done. With no other events within a reasonable distance, I decided to make the NYR SCCA event at Nassau Coliseum. While I don't have anything against the NYR courses, the Coliseum doesn't provide a good surface to actually do any kind of tuning that would work anywhere else except maybe FedEx field in DC but if anything I'd get some data points running on a low grip bumpy surface.
NYR SCCA Autocross - 9-20-2015
Right out of the bat, the bumpiness of the lot was giving me problems with Lupa skipping all over the place making it hard to time the turn in and brake points. I remembered that I had done some funky shock settings last event to compensate for the weird alignment so I dialed the front compression down 1 and front rebound down 3. This greatly improved the front end response but she was still neutral with a slight leaning towards being pushy at the limit.
NYR SCCA Autox - 9-20-2015 Photo by: Rev Match Racing
For the afternoon runs, I opted to raise the rear bar up another notch to 4/7 and this worked magic. Finally she was giving me that telltale jiggly butt behavior you expect from a S2000. It was a bit too much though since it was a tiny bit too loose under power. To fix this I dropped the rear pressures down a 1psi and finally we hit the perfect balance of twitchiness and stability. With the times fairly stable, I started dropping pressures equally on all corners and dropped a good 0.8 seconds simply by dropping the pressures around 1psi. I ran out of runs to do more pressure testing but I'll be doing that in NJ instead where I can keep more variables constant. For my own notes, I ended up running at 30/29psi. I don't think I had a single clean run but it's all good. The important thing is that Lupa is feeling better and better to drive. The transitions, especially slaloms, are much better than last event and I can actually use the power to get that rear rotated now. Looking forward to the next NNJR event to give her a go on some higher speed, higher grip corners.
Not sure if autocross or rallycross lol
NNJR SCCA Autocross - 9/20/2015
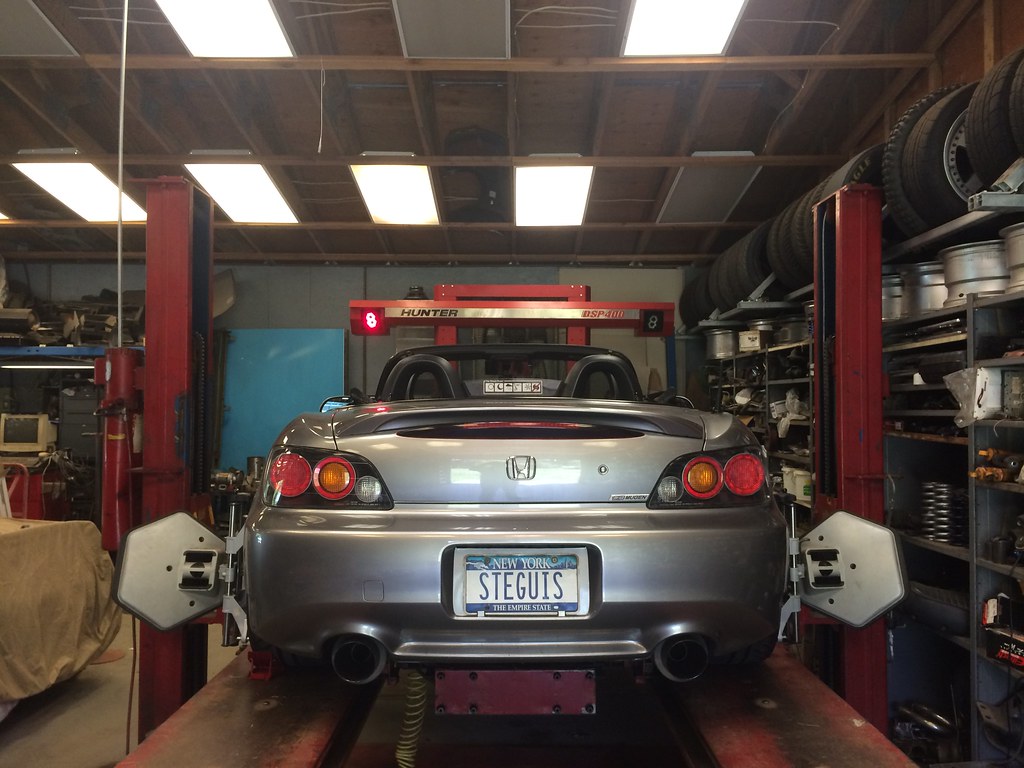
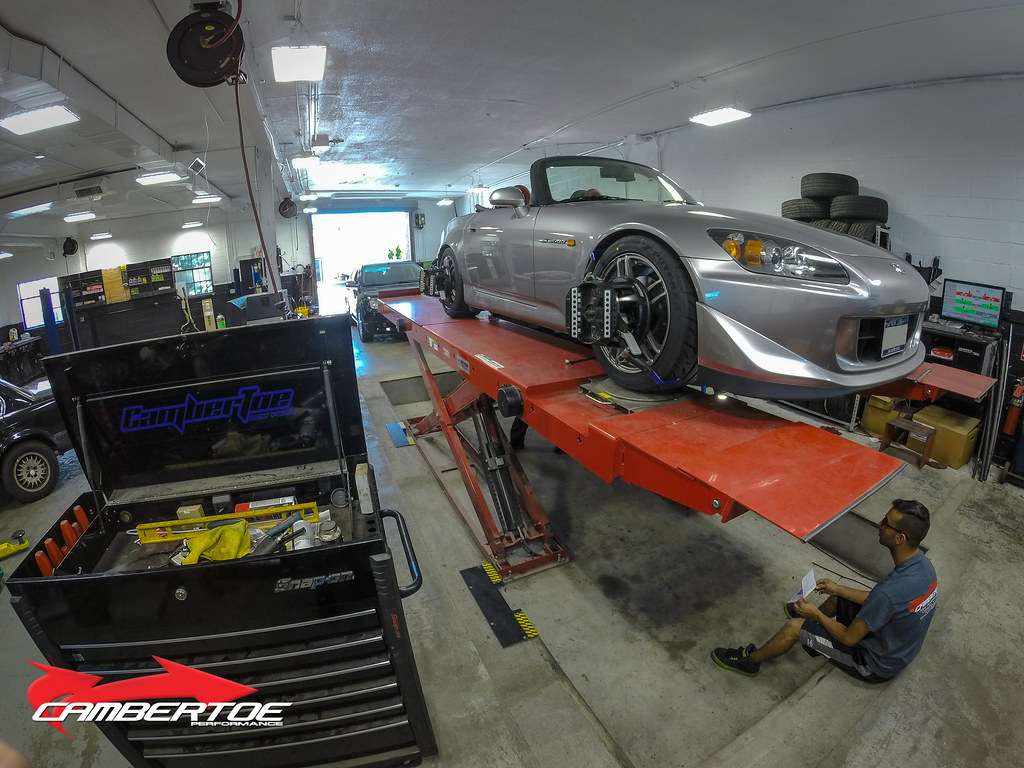
We're fresh back from Nationals and with the lull of general frantic scheduling of work on cars, I wanted to take advantage and have Steve at SJF Performance implement the changes I jotted down after the first event with Lupa. (As a side note, HUUUUUUGE congratulations to SJF for the awesome 1-2 victory in the new CAM-C class in that beastly F-body)
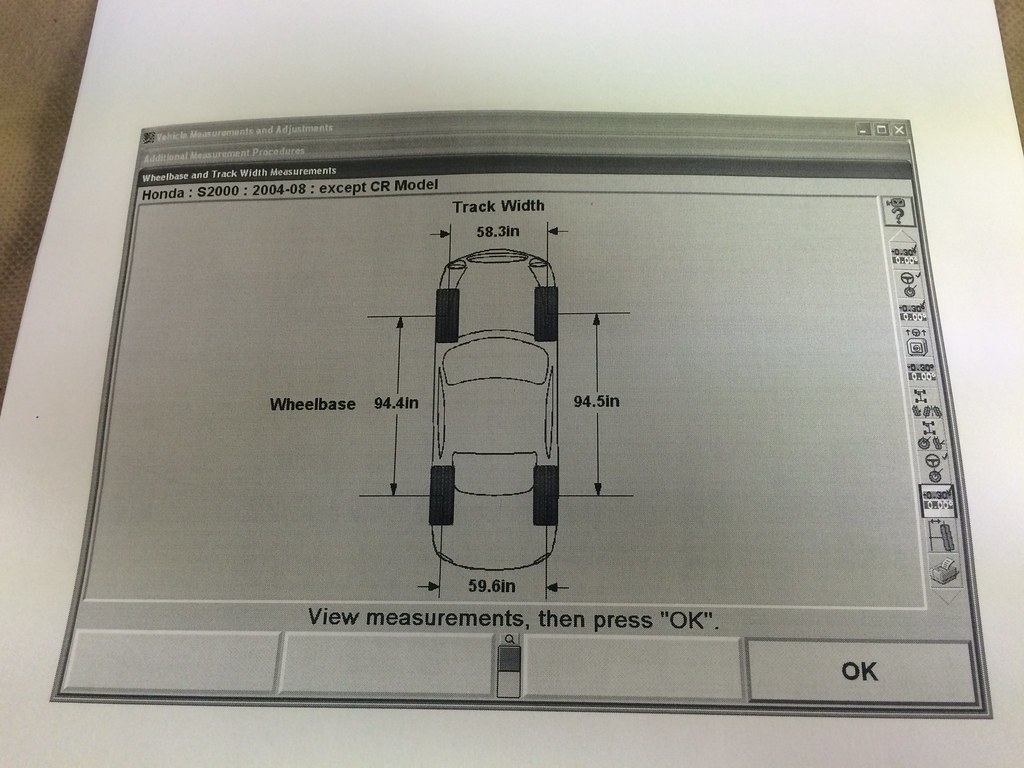
Lupa's 2nd alignment for 2015 - 9/19/2015 - SJF Performance
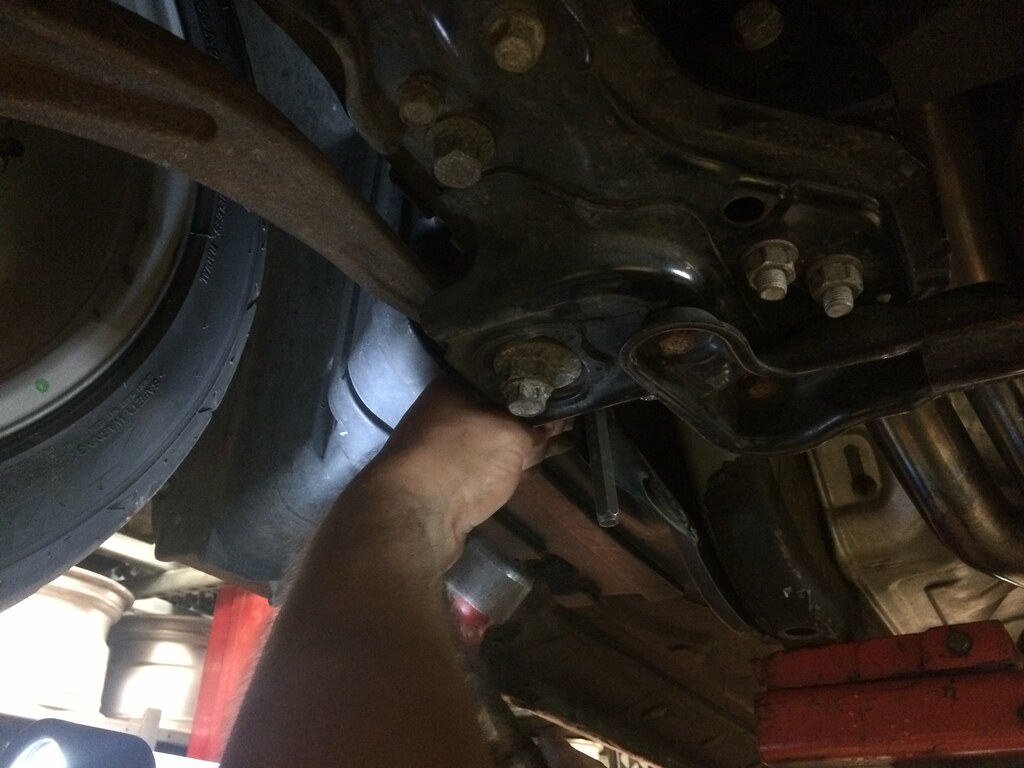
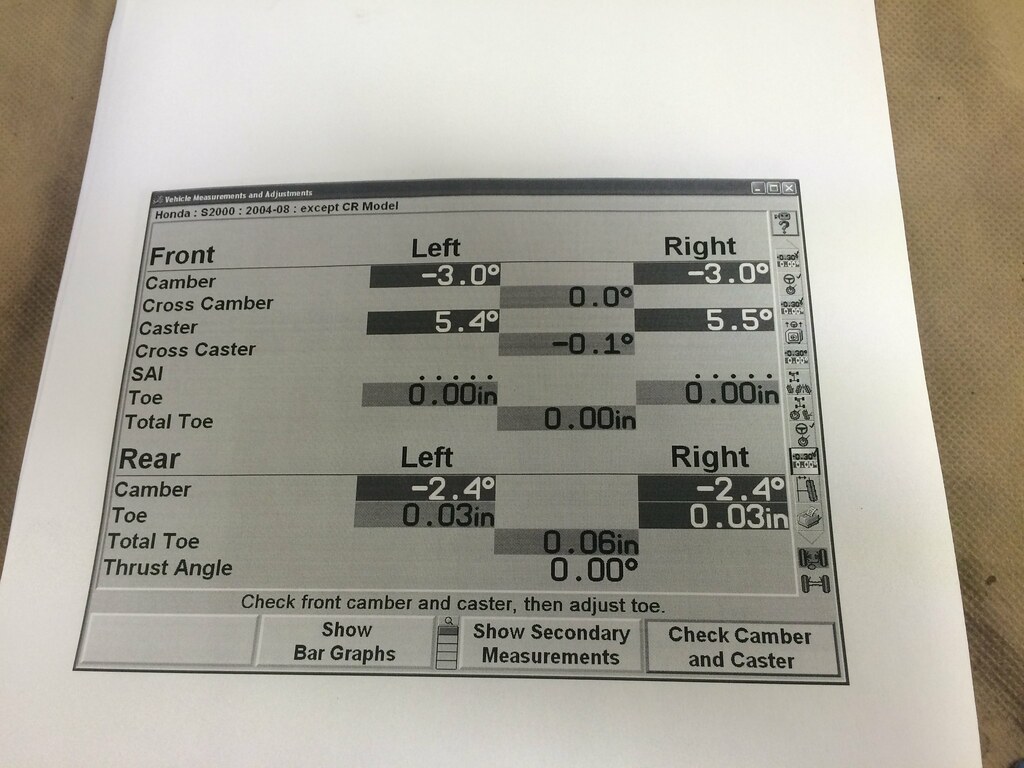
I could already tell that my alignment had shifted after the first alignment after we did the transmission swap but the question would be by how much? Unfortunately it didn't look good. We could only get -2.8 max camber from the front driver side but could get a whopping -4.2 camber from the passenger side. Clearly the front subframe needed to be shifted in order to get the specs I wanted. This proved to be a bit tricky but with some help from Pete and a crowbar, we were able to get -3.0 camber on the left side which Steve then matched on the right. We probably really need to actually do this correctly one day so it's even left and right but it'll do for now since we hit the target settings. Caster was set to 5.5 degrees.
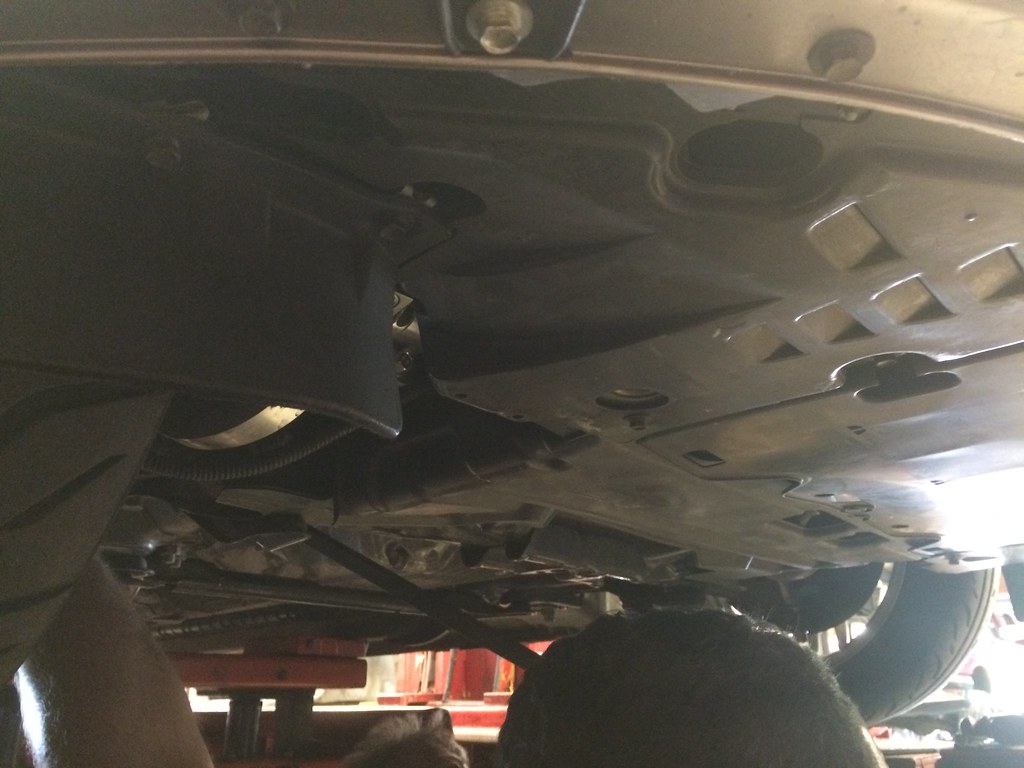
Trying to get frame alignment holes lined up - 9/19/2015
Crowbar + wood + BFH - Working that front subframe - 9/19/2015
I had initially wanted to reduce my rear camber down to -2.2 but it seems that with the current ride height, the minimum rear camber was -2.4 if we wanted to get the rear toe the way I want. This was an ok compromise since the rear toe is super important on the S2000. Get this wrong and you might as well pack your bag. Too little and you got yourself a jigglybutt monster, too much and you're basically driving a FWD car with massive push. I was thinking of doing 1/8" (0.12) total toe in but with the slight increase in rear camber from what I actually wanted, I opted to dial this down to 1/16" (0.06) total toe in. I definitely would not recommend going down this much without the correct spring and sway bar combination or things might get a little too exciting on the street. The final alignment specs and other fancy tidbits are shown below.
2nd Alignment Specs - SJF Performance
Wheelbase 0.1" off due to front subframe alignment
SJF Performance
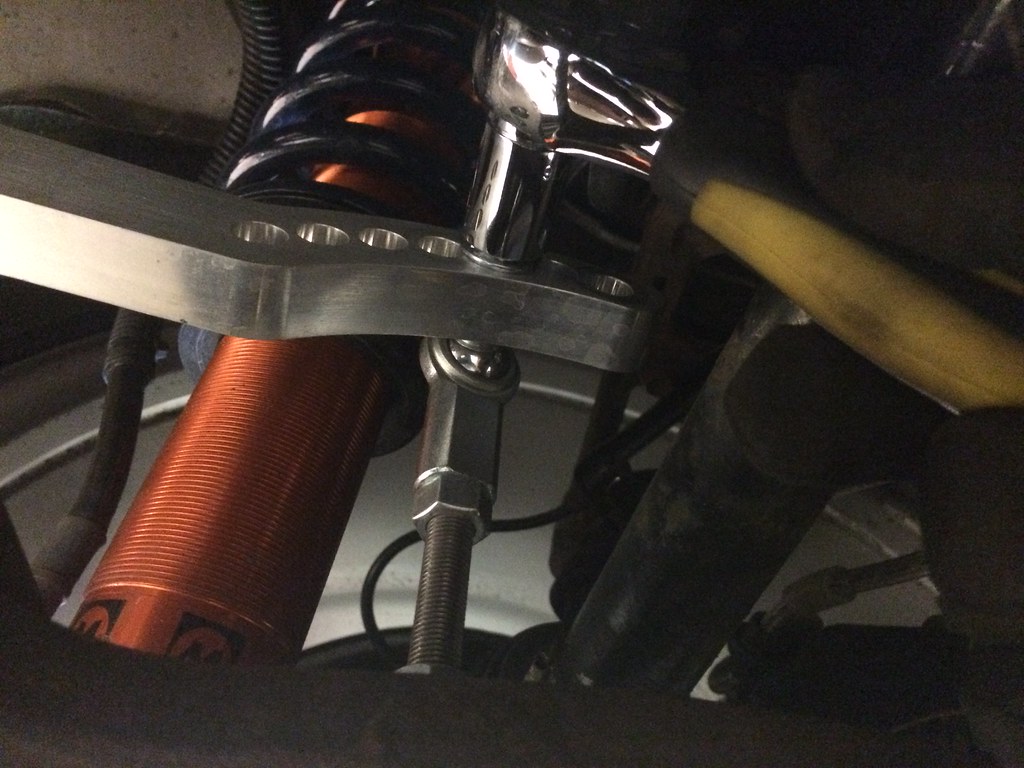
While the car was on the lift anyway, I figured I'd take the opportunity to adjust the sway bar settings and endlink lengths since it's much easier than doing it on site (even though it's still relatively easy to do with the Karcepts bars). The front bar has now been cranked up to full stiff (6/6) up from 5/6. The rear bar I dialed up to 3/7 from 1/7.
Adjusting rear sway bar to 3/7
Adjusting front sway bar to full stiff
Lastly, I have enough miles on the diff now that it's finally broken in so it's important to get a fresh fluid flush to make sure she's in tip top shape.
Fluid flush on the ATS Spec III diff
So there we have it. All the changes from last event put into place I'm going to try and run higher pressures again with the reduced camber. It should make her faster in the transitions and be closer to the optimal pressures for this tire. It should make her easier to use power and the diff to get the rear rotated around tighter spots too. Luckily, tomorrow there's a NYR SCCA event at Nassau Coliseum so I can give her a quick spin to see how I like the new settings. Nassau Coliseum is definitely not a lot you want to be tuning your suspension on so I probably won't be making massive changes but I do expect tighter corners than NJ events so that will help me pinpoint any slow speed corner weaknesses.
Some good news though is that I ended up not needing any of the new aligment bolts, washers and nuts I ordered for her so now I have a spare set (to my other spare lol). No seized nuts! We can all celebrate that.
After months of installing parts and getting her ready, it was time for Lupa's first autocross in full STR trim. Although I had adapted a lot of Bumblestook's settings over to Lupa to try and mimic her balance, I knew it would take time to get her the way we wanted since we had no actual starting point to compare against. We were also on fresh RE71s that hadn't been fully scuffed in so their performance was going to be reduced. Still, it was time to focus on the important thing at hand which was to try and get the balance to a good starting point.
Lupa ready to run - NNJR SCCA - 8-30-2015
I took the first run as a general systems check to make sure there were no issues with the car. There was no rubbing and we were going over the undulations with ease. We were good to push hard now to find the limits. I immediately noticed a very large amount of understeer that needed to get dialed out ASAP. We softened the front shocks and Hez took it out for a run and it was a bit better but still pushy. We also started off running 33/29psi but started to decrease this delta to find the balance and gain traction. I brought my pyrometer but the battery ran out so we were adjusting pressures blindly here unfortunately.
We increased rear compression and added more rebound all around to try and find that perfect balance between being critically damped and keeping the weight where we needed it to be in the transitions and powering out of sweepers. The goal wasn't necessarily to get the fastest time as it was to push the car to explore the limits and make all the necessary adjustments to dial out any observed weaknesses. Every run Lupa was feeling more and more balanced and the setup was moving in the direction we wanted. On the final run, which Hez took, it was important to drive for time rather than for tuning so he drove it normally and set our baseline. We were only a few tenths off the fast STR cars at the end the the day. This is very promising. You can see the difference in how the car behaves in the video of our fastest runs. My time was set on my third run and Hez was on his last run. You can see how much less effort it takes to drive her fast in that last run. He looks like he's on an early morning Tofu delivery run despite clocking in a respectable time.
I'm highly encouraged by Lupa's performance. She unfortunately still exhibits push under power coming out of the tighter turn arounds and could be faster in the transitions with quicker weight transfer. We also ended the event running as low as 27psi all around. That was just a bandaid to try and balance her out but I don't think this is ideal as I'm sacrificing some of that sharpness in steering. There's also too much rear toe preventing her from rotating under power the way I want. The RE71s also seems to not roll much under load so I think we can afford to reduce some of the rear camber and salvage some straight line speed.
Below are the changes I plan on making before her next event. I think she's going to be up there competing for the top spot very soon.
Alignment:
Front: -3.1, a hair of toe out (current -3.1, 0 toe ....well actually unknown since it shifted due to tranny installation)
Rear: -2.2, 1/16" (0.06) total toe in (current -2.4, 0.18 toe in)
Pressures:
Probably try 29/27 but bringing a pyrometer to make proper adjustments.
Also, big thanks to Kamil at Clean Cut Vinyls for making my awesome car/class magnetic numbers and other decals.
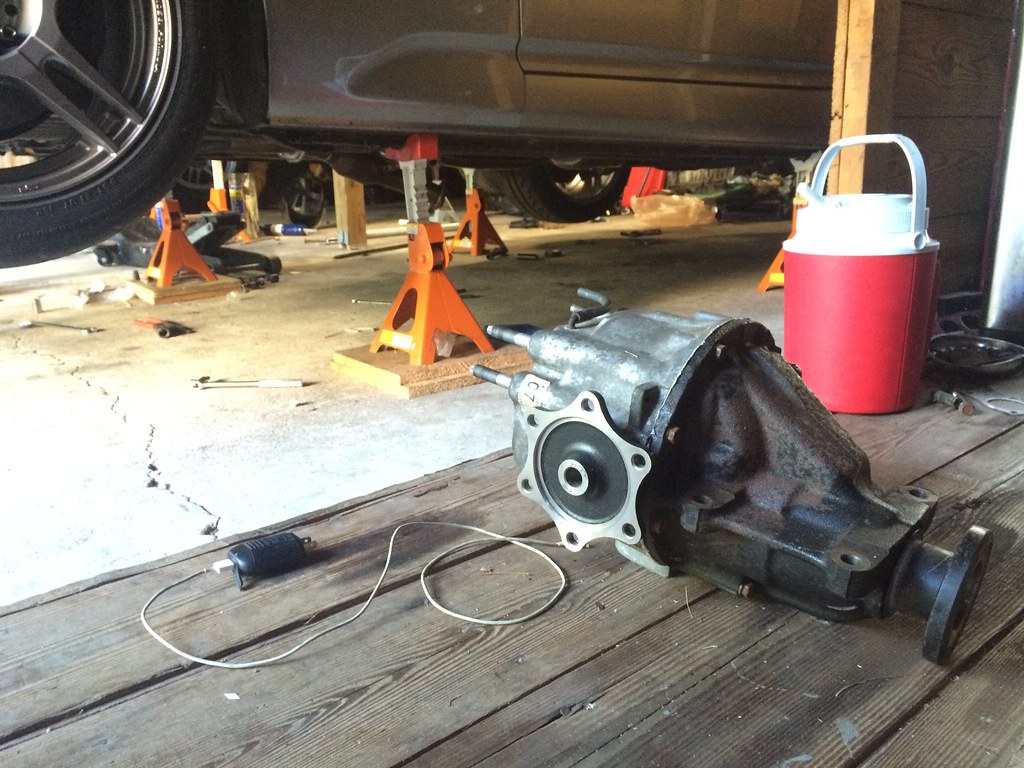
One of the major mechanical issues with Lupa is 2nd gear popout under deceleration. This is due to a known defect that affected a small range of S2000s between late 2004 and early 2005 and is covered by TSB 05-009. Unfortunately Lupa's VIN falls into this affected range of cars but I didn't trust taking my car to any dealer even for warranty service so I had originally planned to just have the transmission rebuilt professionally by Billman. However, after we swapped in an AP1 tranny in Bumblestook, I already had a perfectly known working low mileage AP2 tranny just sitting around so I decided to just swap it in instead.
Transmission swap - 8/15/2015
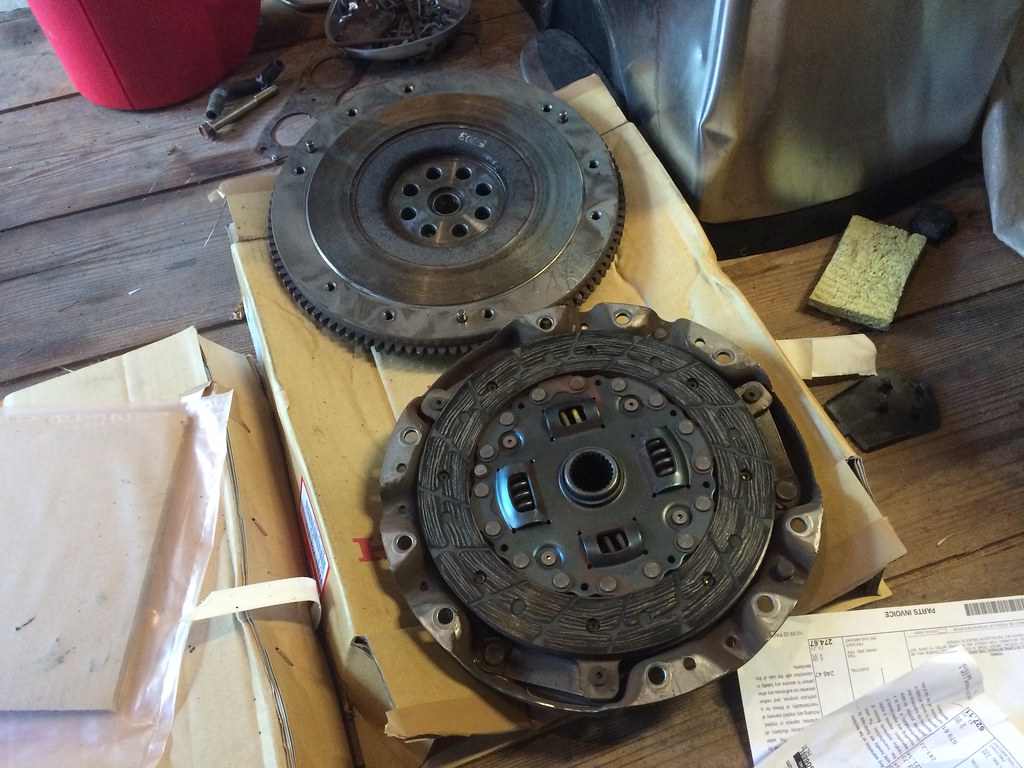
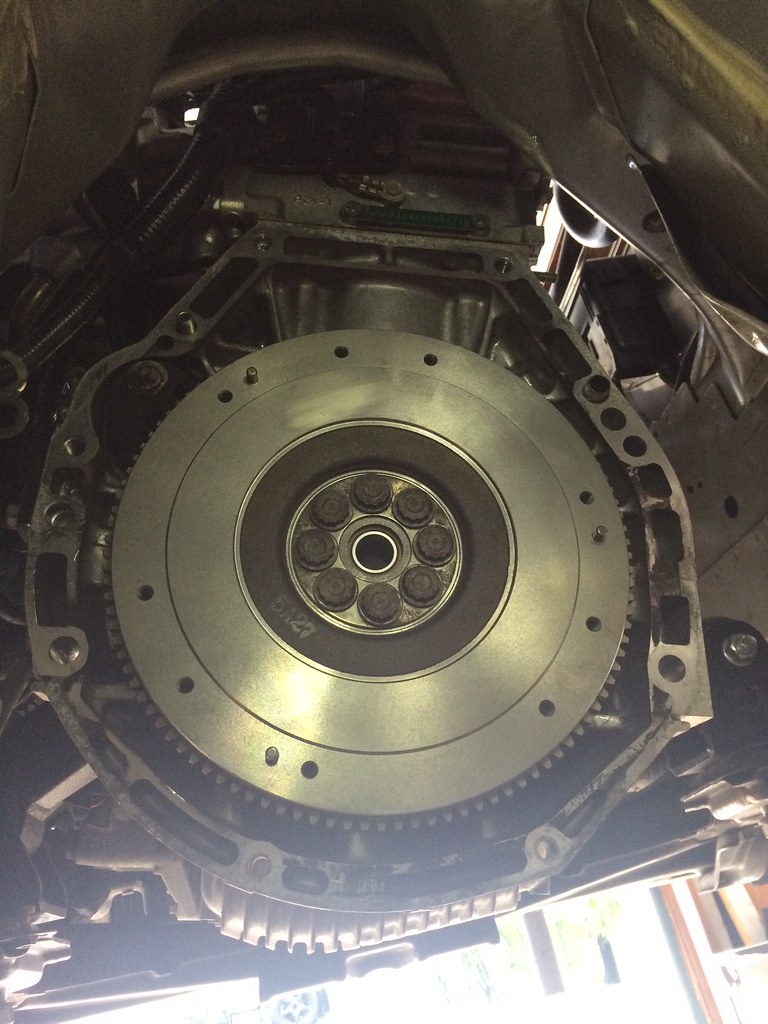
This time I employed the help of Jonathan (Soul Coughing on S2ki Metro) to do the swap for me. Jonathan had already done several clutch, transmission and diff jobs before and as a fellow dual S2000 owner, I felt confident he could do the job right. While we were going to swap the transmission anyway, I decided that even though I only had 55K miles on her, it would make good sense to replace the clutch as well. We put in a brand new OEM AP2 cluch, flywheel, pressure plate and bolts.
Old clutch and flywheel out, still in great condition - 8/15/2015
New clutch and flywheel in - 8/15/2015
Lastly we also swapped in Bumblestook's spare diff pumpkin which has a new ATS Spec III clutch type diff put together by Brian at Karcepts. The OEM torsen is more than capable but I prefer the feel of a clutch type diff and by keeping Bumblestook and Lupa on the same setup, it would be easier for me to continue a similar tuning philosophy and have matching spare parts.
ATS Spec III diff ready to go in - 8/15/2015
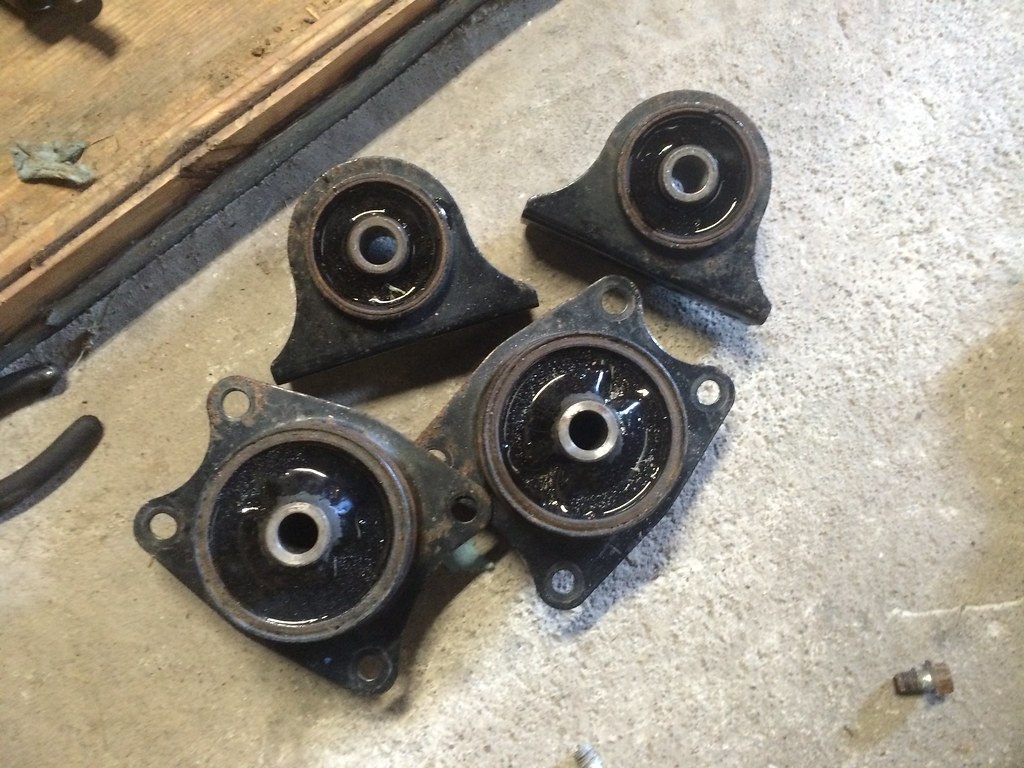
When Rad found his diff mounts were torn during the NJ ProSolo earlier this year, he found a method to just fill the OEM mounts with polyurethane for a cheap DIY poly mount alternative. I had him make a set for me too and we installed those along with the diff to minimize any play as we try to get power down to the ground.
DIY Poly filled OEM Diff mounts - 8/15/2015
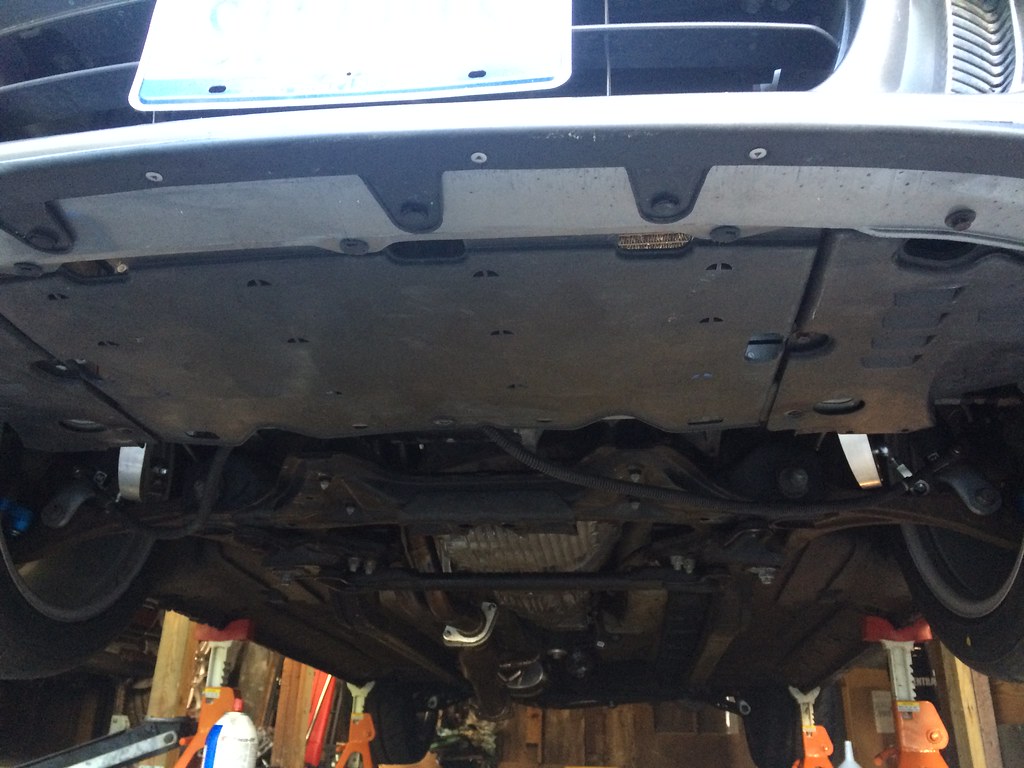
Although we ran into a few annoying issues (mostly because of my swaybars, stiff mounts and dual exhuast was in the way), everything went in smoothly and she's now driving perfectly. I'll have to get another alignment since you have to lower the front subframe to swap transmissions on the S2000 but I probably won't do that until after I come back from Nationals. The good news though is that she's ready for her first event which should happen in 2 weeks barring any further issues. I'll have to make time to drive her quite a bit until then to break in the clutch and diff but that's something that I can at least enjoy. It's been almost 3 months since I ordered the very first part for this STR build and I can finally say all the major mechanical work is done and it's onto having fun and seeing how she stacks up against the other STR cars that have had several years to be developed already.
Huge thanks to Jonathan for doing a great job with this part of the project, taking his time to do it right. It's good to see fellow S2K owners who appreciate the need to do things right and not take shortcuts.
After test fitting the STR spec wheels and tires, it was clear that I'd need an alignment ASAP if I wanted to have Lupa drivable and not ruin my tires or fenders. With SJF Performance unavailable, I was lucky to get squeezed in for an appointment at Camber Toe Performance in Lynbrook this past Saturday.
First alignment - Camber Toe - 8/8/2015
Photo by: Joe Miranda / Camber Toe
Since I haven't autocross Lupa yet, I wanted to just set an initial baseline alignment based on some numbers I had been toying around with on paper. I'm almost certain I'll be re-aligning again before this season was over so a good ballpark would be all that was needed. I ended up with the following alignment specs:
Front:
-3.1 Camber
0 Total Toe
Rear:
-2.5 Camber
0.18 Total Toe In
I'm glad we did the alignment since I was running almost a full inch of toe in at the rear and definitely wasn't running enough camber up front so my fenders were in danger of some carnage if I got full compression load due to a bump or something. I also asked them to bend the fender tab in the front for a little bit more tire clearance. There's no need to do a full roll on +63 offset wheels with 255 sized tires.
We're almost there. I'm shooting to take her out to her first event later this month.
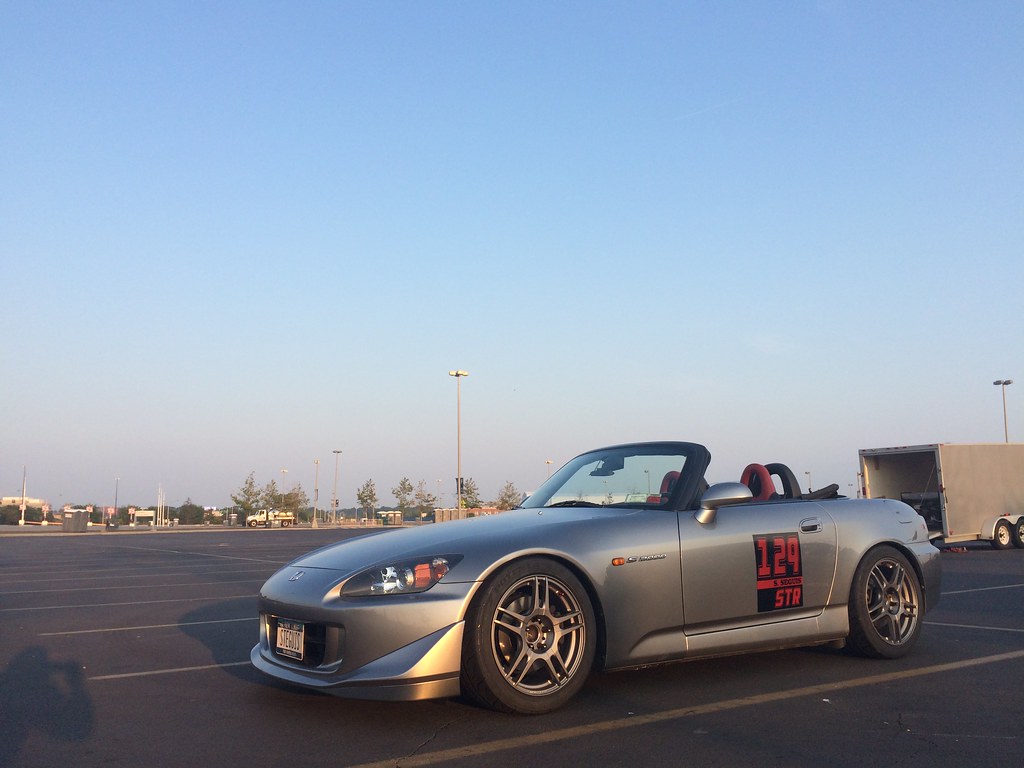
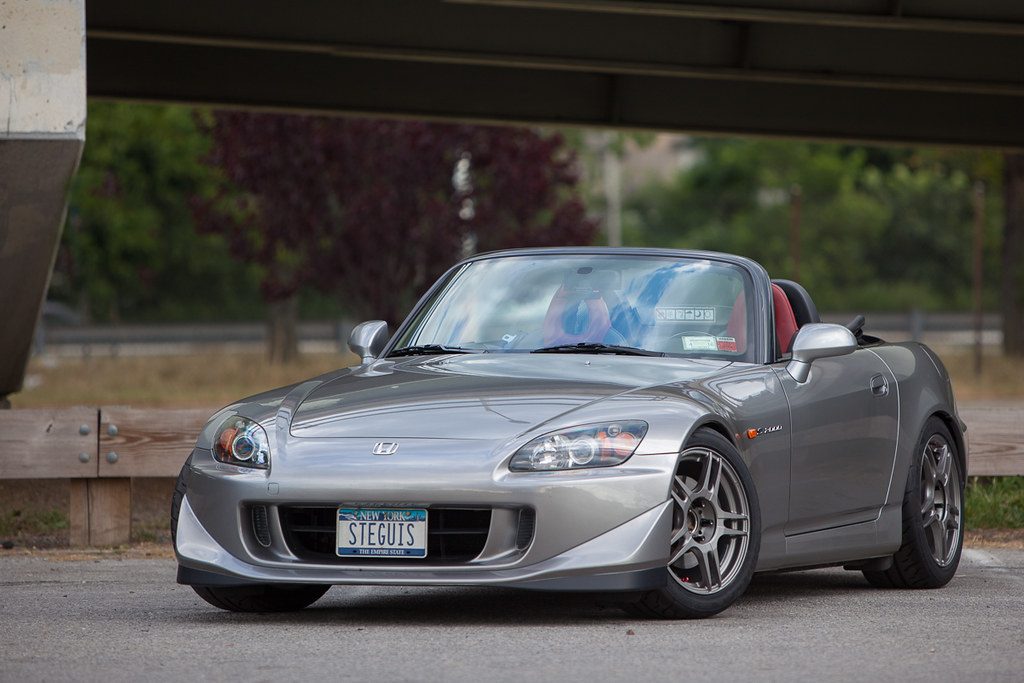
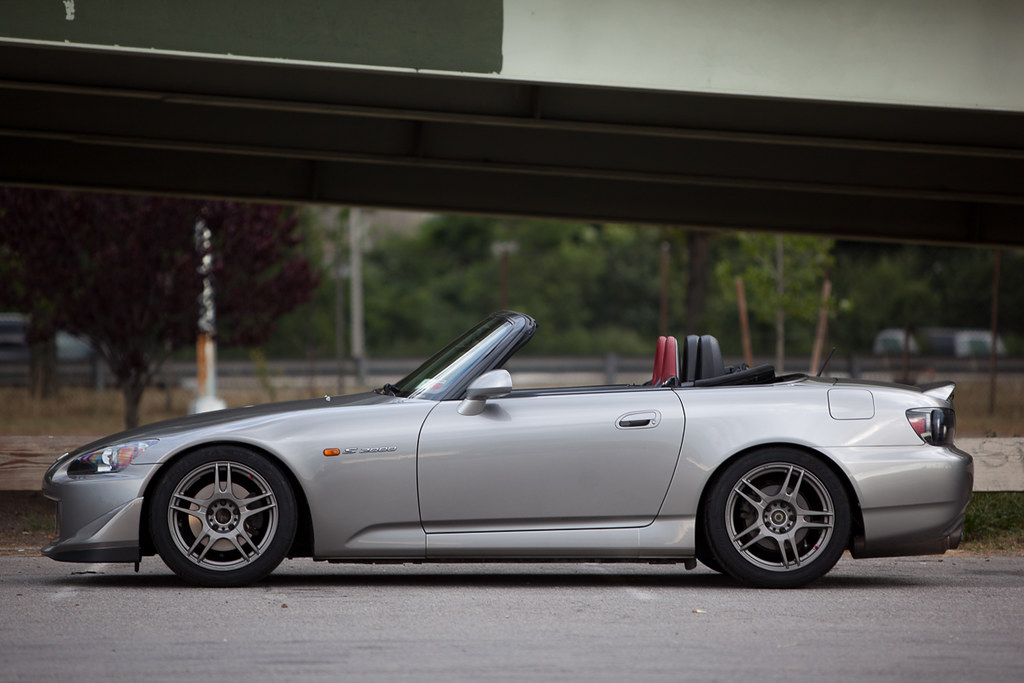
After weeks of letting the springs settle and adjusting the ride height, I'm finally happy with where she sits so I decided to put on the wheels and tires I got for her to complete her STR trim. I didn't want anything expensive or too flashy for the wheels. I looked for something that came in the CR wheels silver color or something that would very closely match the Silverstone color of her body. I went ahead and picked up a set of Kosei K5R in 17x9 +63 offset in light gray.
Lupa in full STR trim - 8/5/2015
In pictures it looked like a good match but it was still a gamble since I hadn't seen these in person on a Silverstone S2000. I was pleasantly surprised to see that they were a perfect match and looked great without being overly flashy or attention grabbing. I was further happy to see that they came mounted with red anodized valve stems. It's a great complement to my black/red interior and soon to arrive red/black class letters/numbers.
Lupa in full STR trim - 8/5/2015
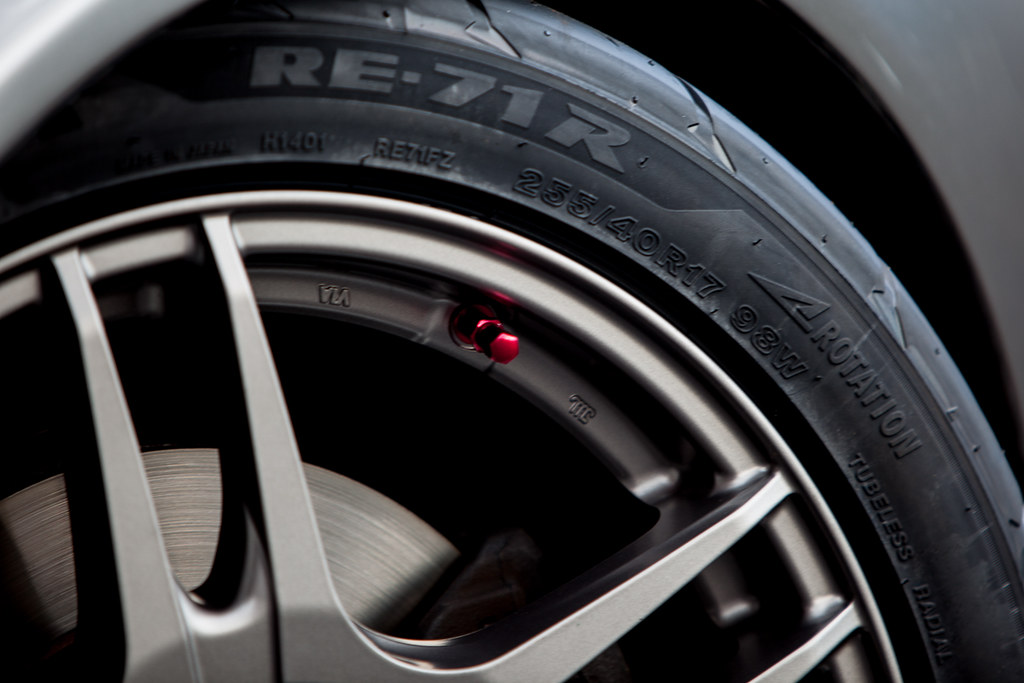
They're wrapped in super sticky 255/40/17 Bridgestone Potenza RE-71R all around. I could immediately feel the increased turn in response with the wider front tires. Next up is an alignment since the front isn't cambered enough and I'm going to have to bend the fender tab a little since it rubs a bit driver side but overall I'm very happy with the fitment.
Not visible on the photos are the lug nuts. I went with EVS Tuning (Evasive Motorsports) "Super lap" open ended racing lug nuts made of forged SCM435 steel alloy since I don't trust aluminum lug nuts.
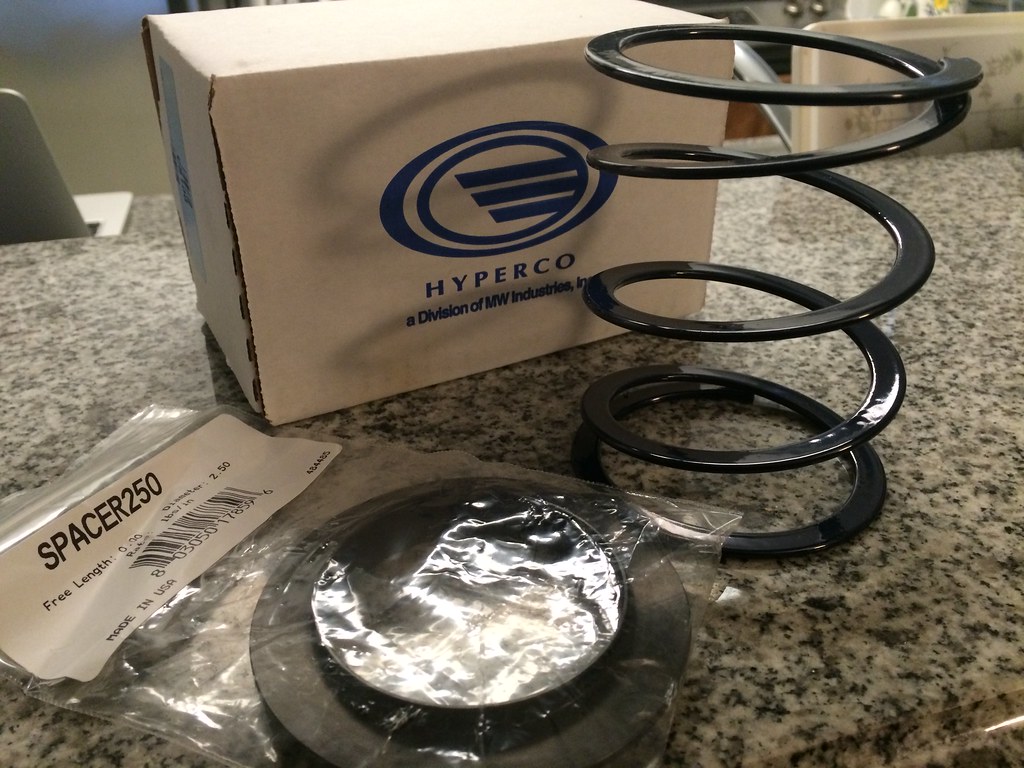
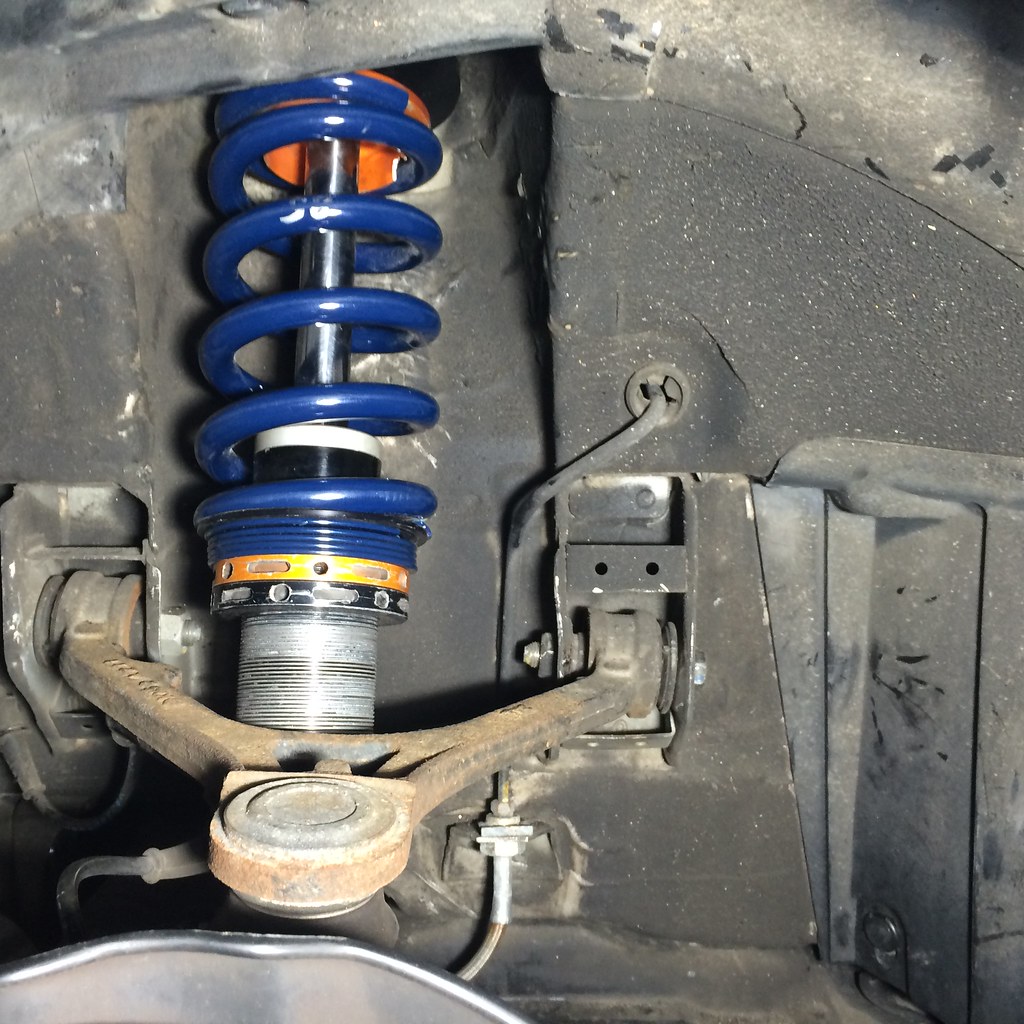
After a week or two of driving and letting the springs settle I decided that running without helper springs was going to drive me nuts. There were just too many little clunks here and there anytime you drove over a bump in the road (plenty of these in NY/NJ). It was also a total pain every time we'd jack the car up and having to make sure the springs seat properly when we lowered the car back down. Despite me not wanting to have to remove and reinstall the shocks, I really had no choice so I ordered a set of Hypercoil 2.5" ID 4" free length helpers and Eibach 2.5"ID spring spacers (couplers?).
Hypercoil 2.5" ID 4" free length helpers with Eibach 2.5" ID spring spacers - 7/7/2015
Since I had to take the shocks apart to install the helpers, I thought I'd double check my setup. After pouring through my notes and blog entries for Bumblestook, my target spring rate difference of 100lbs wasn't going to work (theoretically of course). Assuming the Bridgestone RE-71R generally behaves like a previous generation R-compound tire and that I'm running a square 255 setup versus the 295/315 stagger of Bumblestook, my target should be more like 150-200lb difference front to rear.
Springs removed - 7/8/2015
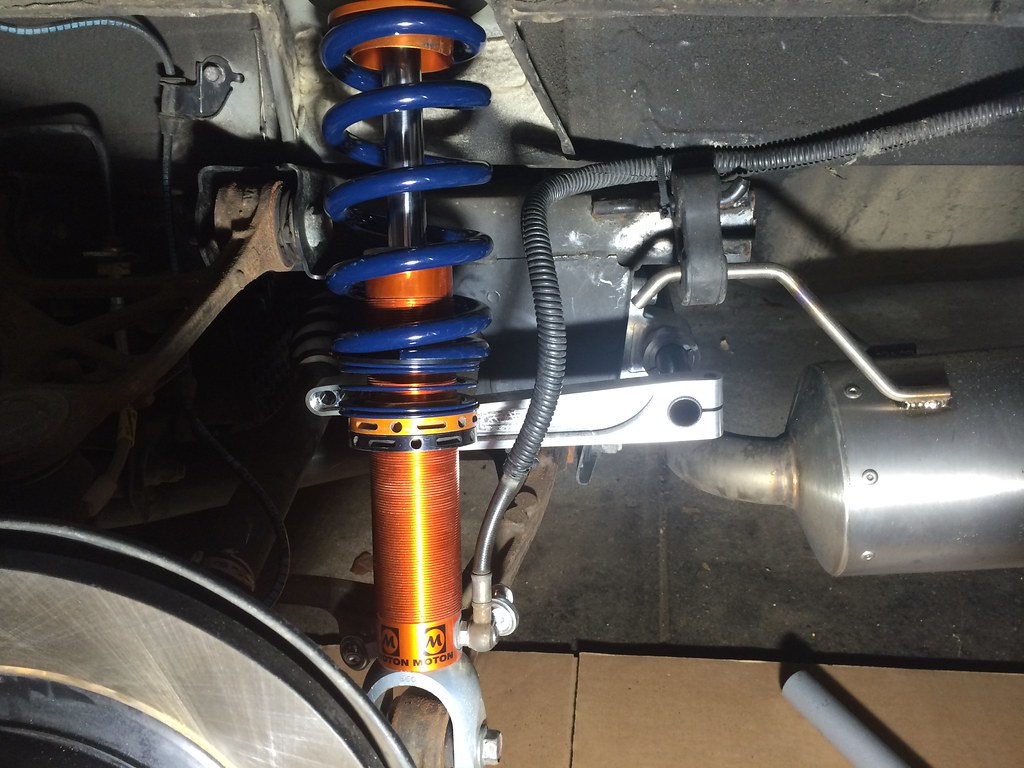
To achieve this, I decided to replace my rear springs and go from 750lb to 650lb (leaving the 850lb springs up front). I think this will help keep the rear more stable and add some mechanical grip as well as more compliance to bumps and undulations. This would also allow me to up the rear sway bar setting from full soft to 3/7 stiffness and give me room for fine tuning later. The front sway bar is staying at 5/6 stiff.
Hypercoil 650lb springs and helpers installed in the rear - 7/17/2015
It turns out that my front springs were 2.25" ID so my 2.5" helpers weren't going to work so I ended up ordering new 850lb 2.5" ID 7" Hypercoil springs for the front so I can give the old ones back to Rad.
Hypercoil 850lb springs and helpers installed in the front - 7/17/2015
I reset the ride height back to a stock-ish 14.5" but I'm hoping it'll settle to around 14" over time or I'll just adjust it a few weeks after I've gotten some miles on them. I took it out for a good test drive and I'm very happy with the results. No more clunking. Everything feels solid. The damping is perfect and I think the 650lb rear springs is the ticket. Just the right amount of stiffness while the 850lb fronts gives very fast and responsive turn-ins (still miss the AP1 steering rack though in Bumblestook).
There's still some work to do before I can take her out to her first event but she's getting there. I'm basing my initial setup from years of driving S2000s and my driving style using Bumblestook as the reference but I won't know for sure if the formula works until my first event. I'm hoping it'll at least be within the ball park so I won't have to make too many major adjustments.